Local Access
LeafKVM supports multiple ways to establish a local connection between the device and your control host. This page describes how to access LeafKVM when both sides are on the same network, as well as how to connect directly via Wi-Fi hotspot or Ethernet.

All settings can be configured through the WebUI or the touchscreen UI. Refer to the touchscreen UI guide for instructions.
Accessing LeafKVM on an Existing Network
Section titled “Accessing LeafKVM on an Existing Network”When both LeafKVM and your control host (PC, laptop, or server) are connected to the same LAN / WLAN, you can access the Web UI using the IP address displayed on the device’s home screen.
Wired (Ethernet) Connection
Section titled “Wired (Ethernet) Connection”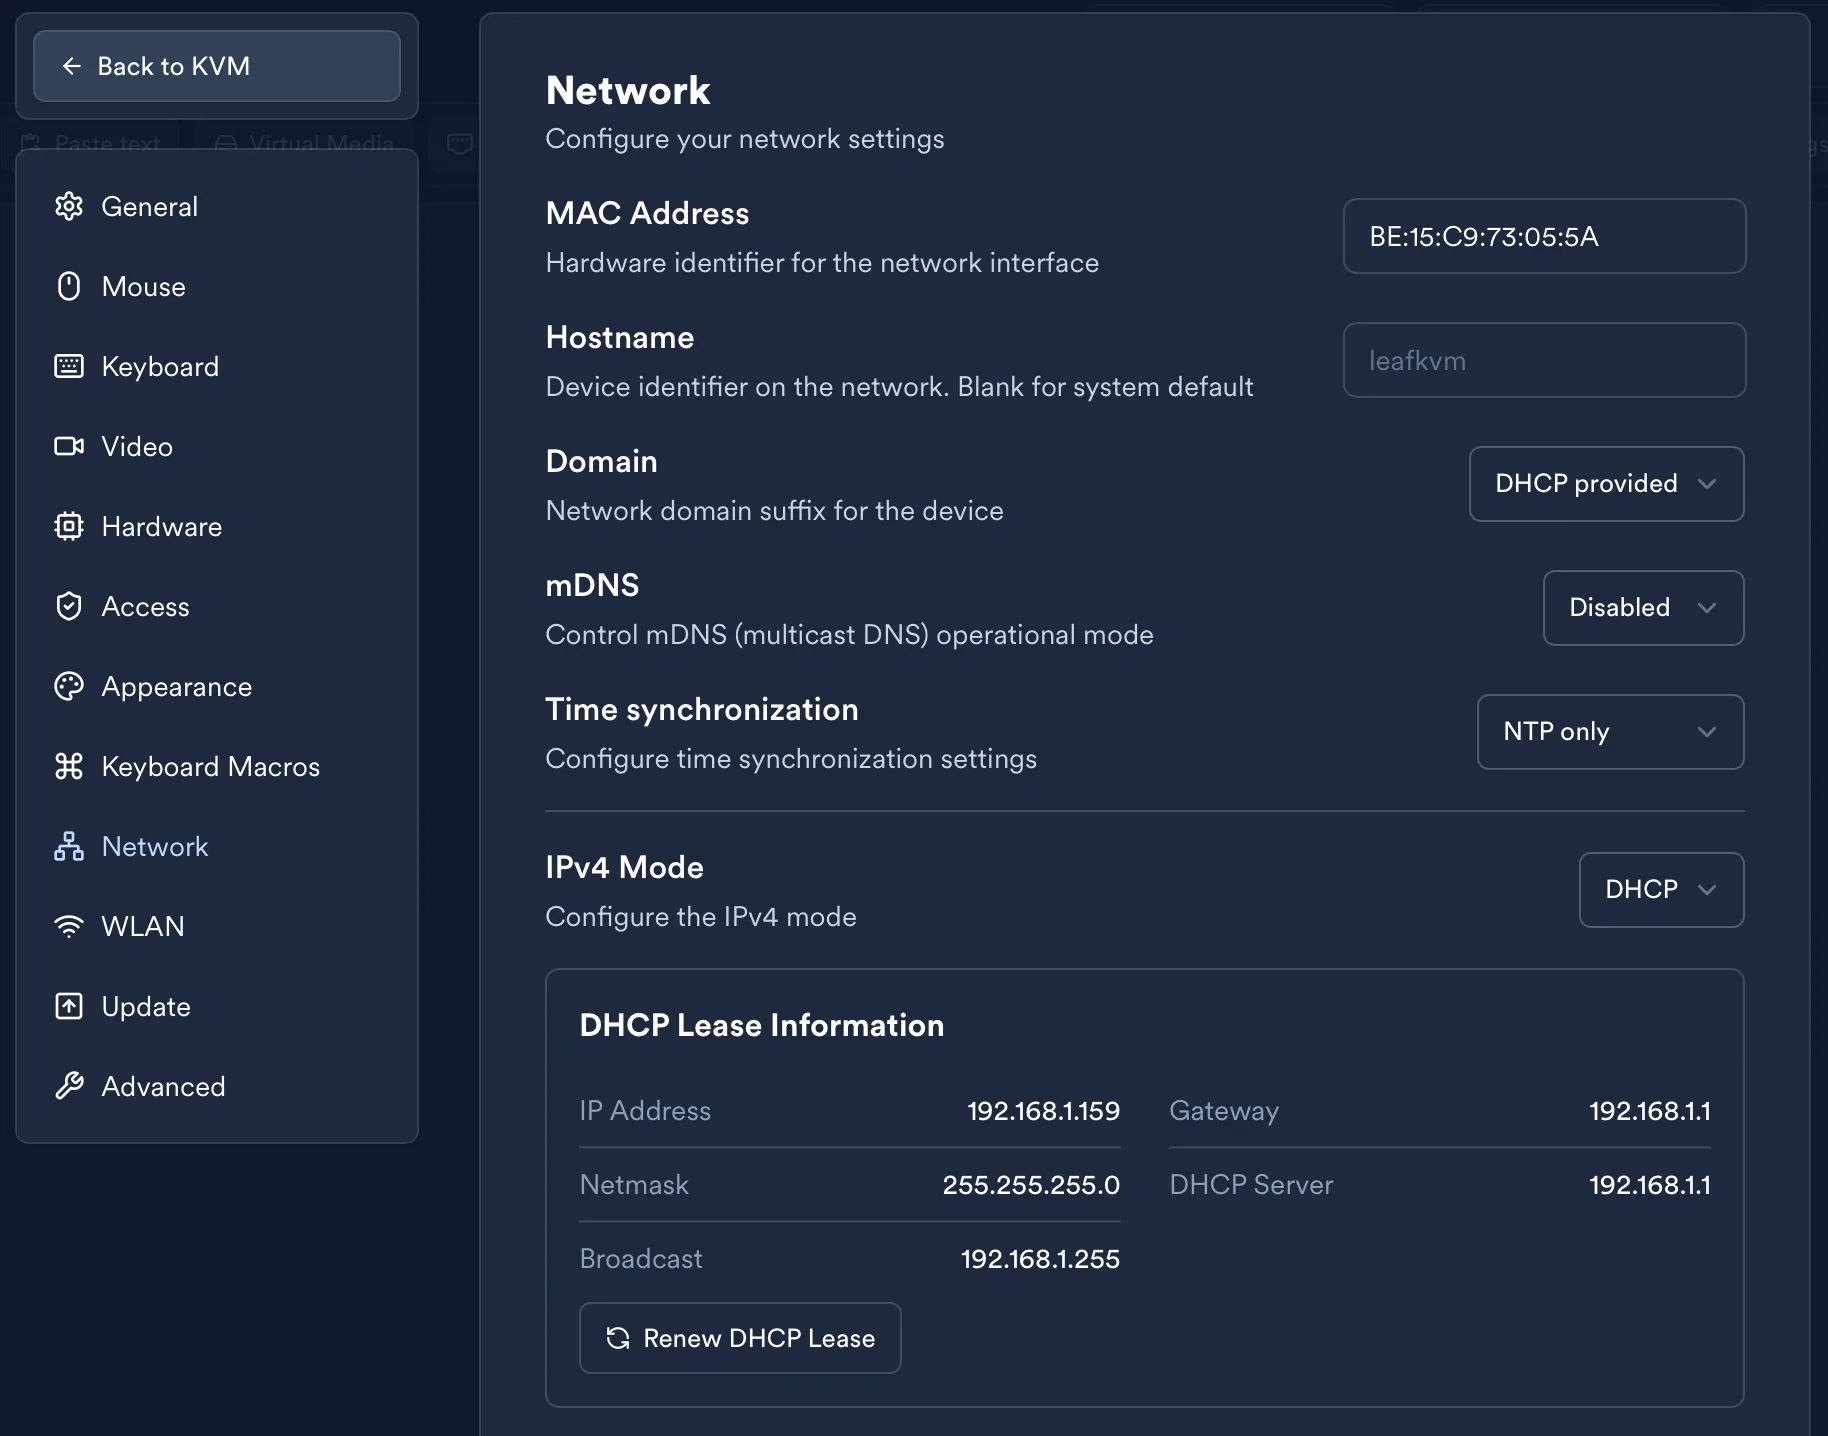
Before connecting, check the Ethernet settings on LeafKVM:
-
DHCP mode
LeafKVM requests an IP address from your router automatically.
Once connected, the assigned IP address will appear on the home screen. -
Manual (Static IP) mode
Ensure that:- The IP address is valid for your LAN.
- The subnet mask is entered in CIDR format.
Wireless (WLAN) Connection
Section titled “Wireless (WLAN) Connection”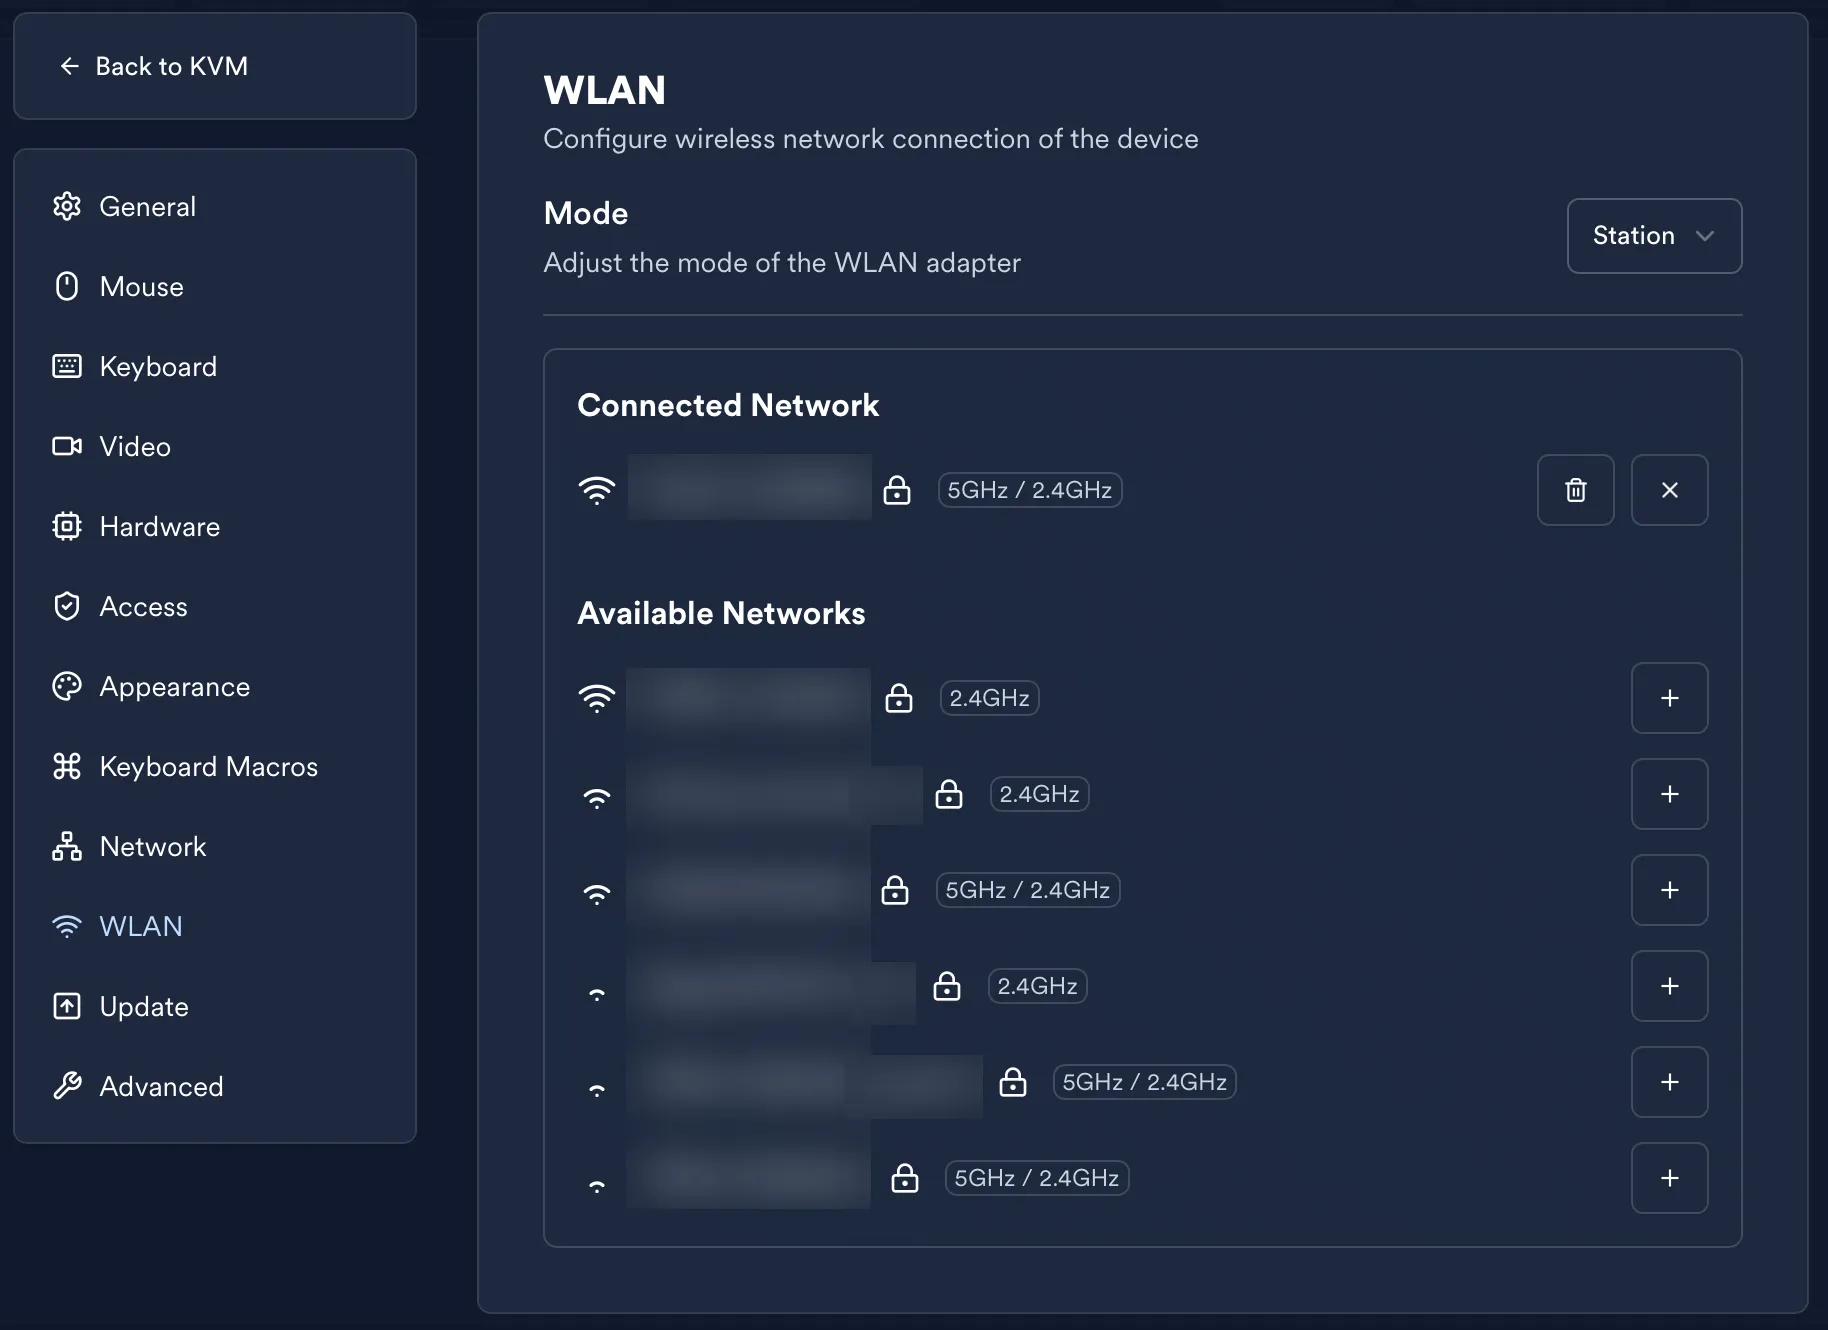
- Station mode (STA)
LeafKVM functions as a client (station) and connects to an existing Wi-Fi network.
At present, STA mode supports only DHCP.
After LeafKVM obtains an IP address, any host on the same network can access it:
http://<device-ip>https://<device-ip>If HTTPS is enabled:
Accessing LeafKVM Without an Existing Network
Section titled “Accessing LeafKVM Without an Existing Network”You can connect directly to LeafKVM through either the built-in Wi-Fi hotspot or an Ethernet cable.
Option A: LeafKVM Creates a Wi-Fi Hotspot
Section titled “Option A: LeafKVM Creates a Wi-Fi Hotspot”LeafKVM can act as a Wi-Fi access point:
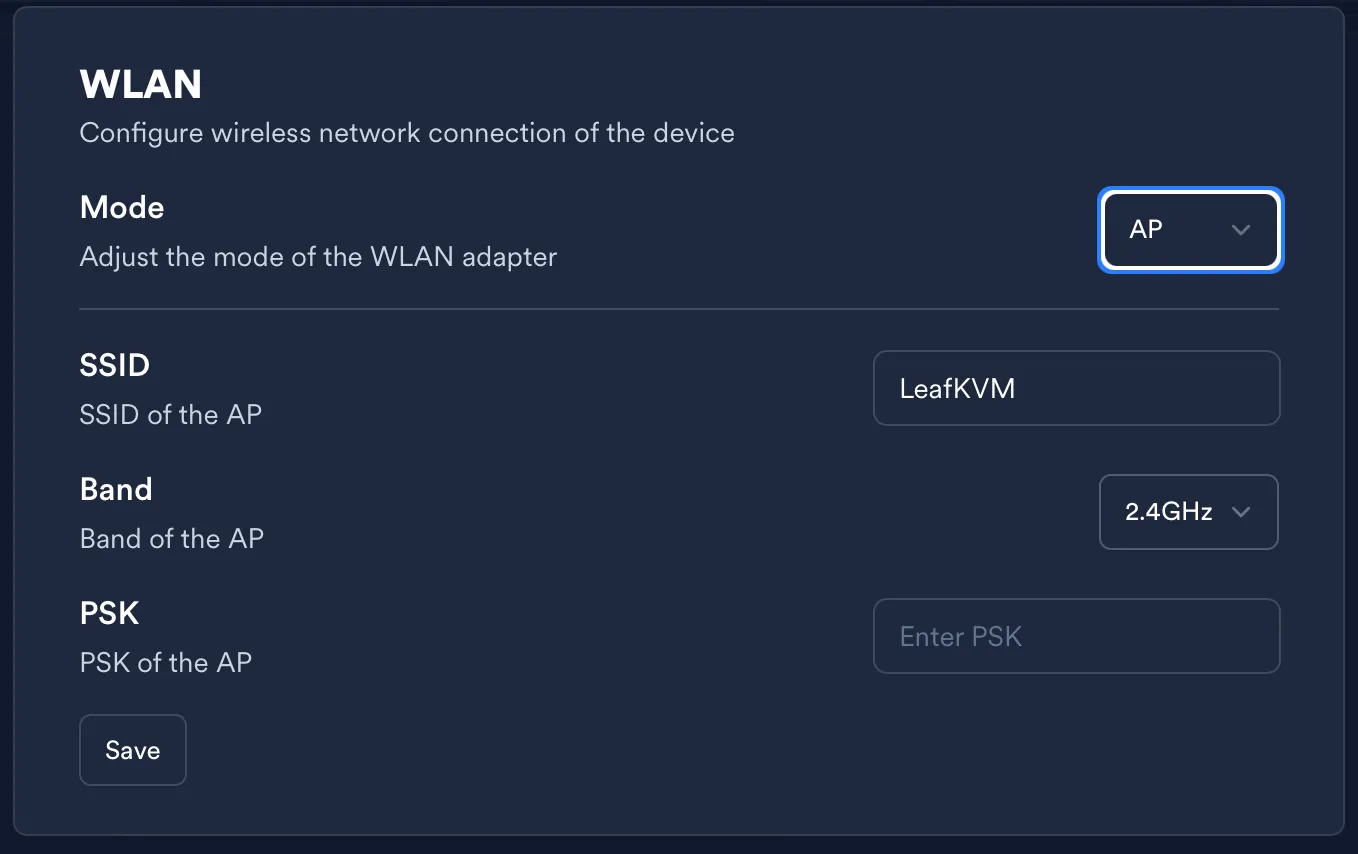
- The hotspot automatically enables a DHCP server.
- The device’s IP address on this network is shown on the home screen.
- After connecting your control host to the hotspot, simply visit:
http://<device-ip>
Option B: Direct Ethernet Cable Connection
Section titled “Option B: Direct Ethernet Cable Connection”You can connect the control host directly to LeafKVM with a network cable. There are two possible setups:
1. Both sides use manual IP addresses
Section titled “1. Both sides use manual IP addresses”Assign IPs in the same subnet. For example:
- LeafKVM:
192.168.10.1/24 - Host PC:
192.168.10.2/24
Then, access LeafKVM via: http://192.168.10.1
2. LeafKVM provides DHCP to the host
Section titled “2. LeafKVM provides DHCP to the host”If LeafKVM is configured in Ethernet → Manual mode with DHCP server enabled:
- LeafKVM assigns an IP to itself (e.g.,
192.168.50.1/24). - The host automatically receives an IP from LeafKVM’s DHCP server.
- Access the Web UI using the IP shown on LeafKVM’s home screen.
Summary
Section titled “Summary”In all connection scenarios—existing network, Wi-Fi hotspot, or direct cable—the LeafKVM IP address is always displayed on the home screen. Accessing the device only requires entering that IP into your browser using HTTP or HTTPS.
© 2026 LeafKVM Team
Contact